


How to install a security camera in a 40ft cabin tiny house?
Jul 30, 2025
Leave a message
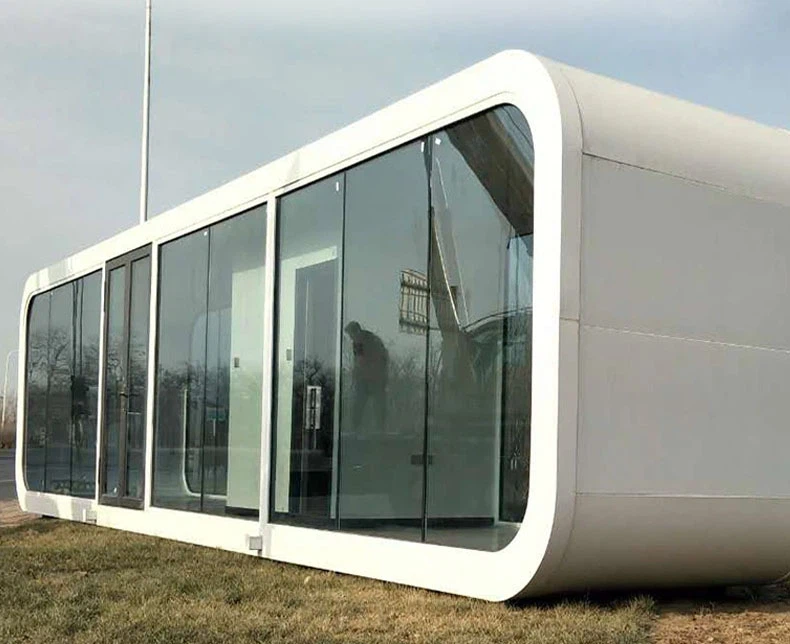
Hey there! As a supplier of 40ft cabin tiny houses, I've had my fair share of customers asking about installing security cameras. It's a smart move, especially when you're living in a cozy 40ft Cabin Tiny House. In this blog, I'll walk you through the process of installing a security camera in your 40ft cabin tiny house, step by step.

Step 1: Choose the Right Security Camera
First things first, you gotta pick the right security camera for your needs. There are tons of options out there, so it can be a bit overwhelming. But don't worry, I'll break it down for you.
Types of Security Cameras
- Wired Cameras: These cameras are connected to your home's power and network via cables. They're usually more reliable and offer better video quality, but they can be a pain to install, especially in a tiny house.
- Wireless Cameras: These cameras run on batteries or solar power and connect to your home's Wi-Fi network. They're easier to install and more flexible, but they may have some connectivity issues and shorter battery life.
- Indoor vs. Outdoor Cameras: Make sure you choose a camera that's designed for the environment where you'll be installing it. Outdoor cameras need to be weatherproof and able to withstand extreme temperatures.
Features to Look For
- Resolution: Look for a camera with at least 1080p resolution for clear and detailed video.
- Field of View: A wider field of view means you can cover more area with fewer cameras.
- Night Vision: If you want to monitor your property at night, make sure the camera has good night vision capabilities.
- Motion Detection: This feature alerts you when the camera detects movement, so you can keep an eye on any suspicious activity.
- Two-Way Audio: Some cameras allow you to communicate with people on the other end, which can be useful if you need to scare off intruders or talk to delivery drivers.
Step 2: Plan Your Camera Placement
Once you've chosen your camera, it's time to plan where you're going to install it. Here are some things to consider:
Coverage Areas
- Entry Points: Install cameras near all the doors and windows of your tiny house to monitor who's coming and going.
- Perimeter: If you have a yard or outdoor area around your tiny house, consider installing cameras along the perimeter to keep an eye on any activity outside.
- Blind Spots: Look for areas around your tiny house that are not easily visible from the street or other cameras. These are potential blind spots where intruders could hide.
Height and Angle
- Height: Mount your cameras at a height of at least 7 feet to prevent them from being easily tampered with.
- Angle: Adjust the angle of your cameras so that they cover the areas you want to monitor. Make sure they're not pointing directly at the sun or other bright light sources, as this can cause glare and affect the video quality.
Step 3: Gather Your Tools and Materials
Before you start installing your camera, make sure you have all the tools and materials you need. Here's a list of the basic tools and materials you'll need:
- Drill and Bits: You'll need a drill to make holes in the walls or ceiling for mounting the camera.
- Screwdriver: You'll need a screwdriver to attach the camera to the mounting bracket.
- Wire Strippers: If you're installing a wired camera, you'll need wire strippers to strip the insulation from the cables.
- Cable Ties: You'll need cable ties to secure the cables and keep them organized.
- Mounting Bracket: Make sure you have the right mounting bracket for your camera. Some cameras come with a mounting bracket included, while others require you to purchase one separately.
- Power Adapter: If you're installing a wired camera, you'll need a power adapter to connect the camera to your home's power supply.
- Wi-Fi Router: If you're installing a wireless camera, you'll need a Wi-Fi router to connect the camera to your home's network.
Step 4: Install the Camera
Now it's time to install the camera. Here's a general guide on how to install a security camera:
Wired Cameras
- Locate the Power Source: Find a nearby electrical outlet or junction box where you can connect the camera's power cable.
- Run the Cables: Use a drill to make holes in the walls or ceiling for the cables. Run the power and network cables from the camera to the power source and Wi-Fi router.
- Mount the Camera: Attach the mounting bracket to the wall or ceiling using screws. Then, attach the camera to the mounting bracket.
- Connect the Cables: Connect the power and network cables to the camera and the power source and Wi-Fi router.
- Test the Camera: Turn on the power and check if the camera is working properly. Adjust the angle and settings as needed.
Wireless Cameras
- Choose a Location: Find a location where the camera has a clear view of the area you want to monitor and is within range of your home's Wi-Fi network.
- Mount the Camera: Attach the mounting bracket to the wall or ceiling using screws. Then, attach the camera to the mounting bracket.
- Power On the Camera: Insert the batteries or connect the solar panel to the camera.
- Connect to Wi-Fi: Follow the instructions in the camera's manual to connect the camera to your home's Wi-Fi network.
- Test the Camera: Use your smartphone or computer to access the camera's app and check if the camera is working properly. Adjust the angle and settings as needed.
Step 5: Configure the Camera Settings
Once you've installed the camera, it's time to configure the settings. Here are some settings you may want to adjust:
- Video Quality: Set the video quality to the highest level that your camera and network can support.
- Motion Detection Sensitivity: Adjust the motion detection sensitivity to avoid false alarms.
- Recording Schedule: Set the camera to record continuously or only when it detects motion.
- Notification Settings: Configure the camera to send you notifications when it detects motion or other events.
Step 6: Maintain Your Security Camera
To keep your security camera working properly, you'll need to perform regular maintenance. Here are some tips on how to maintain your security camera:
- Clean the Lens: Use a soft, dry cloth to clean the camera's lens regularly to remove dirt and debris.
- Check the Batteries: If you're using a wireless camera, check the batteries regularly and replace them as needed.
- Update the Firmware: Check for firmware updates regularly and install them to ensure your camera has the latest features and security patches.
- Test the Camera: Test the camera regularly to make sure it's working properly.
Conclusion
Installing a security camera in your 40ft Apple Cabin Tiny House is a great way to enhance your security and peace of mind. By following these steps, you can install a security camera quickly and easily. If you have any questions or need help with the installation process, feel free to reach out. We're here to help you make the most of your Pod House Apple Cabin. Whether you're looking to purchase a new 40ft cabin tiny house or need advice on security camera installation, we're just a message away. Let's start the conversation and find the perfect solution for your needs.
References
- Various consumer electronics reviews and guides for security cameras.
- Manufacturer's manuals for security cameras and related equipment.
Send Inquiry